If you enjoy quilting or simply working with fabric printing, you may have been mesmerized by the wide range of designs and patterns available. Have you ever considered the extensive procedure that goes into making these fabrics? In this blog post, we ask you to join us on a guided tour of a modern cotton print. We will go into the numerous procedures involved in preparing, printing, and finishing cloth, revealing the secrets behind the mesmerizing printed fabrics we like.
As you travel along, you’ll gain insightful knowledge about a sector of the economy that is frequently ignored. Each step is essential in transforming a rigid and unattractive product into a lively, high-quality printed fabric, from the early stage of dealing with raw cotton yarns to the distribution of the finished fabric. This thorough manual will deepen your understanding and enjoyment of the delicate artistry involved, whether you are a quilter, a textile enthusiast, or simply interested in the production procedures that give our favorite fabrics life.
So let’s explore the fascinating world of fabric printing and learn about the precise artistic skill and technological know-how needed to create the gorgeous printed fabrics that beautify our life.
The Beginning: Grey Goods and Preparation
At the beginning of the fabric printing process, we encounter “grey goods.” These raw cotton strands were woven into fabric, resulting in a stiff and less-than-perfect product. The stiffness is caused by the starch and sizing chemicals used to stabilize the yarns during weaving, but the dirty appearance is caused by the presence of unprocessed and unclean fibers.
Grey goods are often delivered to the print plant in two forms: square bales of folded fabric or huge rolls holding 120 to 250 yards of fabric. The process of changing these raw fibers into visually appealing printed textiles begins with a series of important preliminary processes.
1. Singeing
Singeing is the first step in the preparation process. Before moving on to the next stage of production, projecting fibers from cotton grey fabrics typically need to be removed. To do this, the fabric is subjected to a high-speed gas flame after being passed through brushes, which elevate the fibers. The surface fibers of the cloth are burned off by the flame, leaving a considerably smoother fabric surface than before.
2. Scouring
After the fabric has been singed, it goes through a chemical washing procedure referred to as scouring. Wax and seed shards are naturally present in cotton fibers and must be removed. An alkaline solution, usually sodium hydroxide, is used to boil the fabric, creating a soap-like material. It is essential to keep oxygen out of the scouring process in order to ensure its efficacy because the chemicals used could otherwise weaken the cotton fibers.
3. Desizing
The fabric then moves on to the desizing process after being cleaned. Desizing, as the name implies, entails removing the sizing chemicals that were applied to the yarns before to weaving. The crucial process of sizing fortifies the strands and keeps them from breaking during weaving. Starches and other sizing agents are broken down by enzymes during desizing. For an enzymatic desizing treatment to be successful, pH, temperature, and water hardness must all be strictly regulated.
4. Bleaching
The cotton fibers still have a yellowish hue even after being subjected to scouring and desizing. The fabric is bleached to make it completely white, which is needed for dyeing or printing. Contrary to domestic bleach, commercial cotton bleaching uses a distinct chemistry. The bleaching chemical of choice is usually hydrogen peroxide. The bleaching chemical concentration and solution temperature are gradually raised during each bath that the fabric is placed in. The end effect is a fabric that went from being yellowish to being a more immaculate, pure white.
5. Mercerization and Tempering
These are the last two processes in the preparation procedure. The process of “mercerization” fortifies cotton fibers and improves their glossy appearance. However, the cloth could potentially shrink as a result of this treatment. The fabric is simultaneously run through a tempering machine to maintain its width. The fabric is transported through a lengthy heated chamber while being stretched between pins on either side of the selvage. The fabric thus gains more stability, gloss, and strength.
After completing the preparation stage, the cloth has experienced numerous treatments, ranging from bleaching to singeing, leaving it cleaner, smoother, and prepared for the following step: printing.
FABRIC PRINTING METHODS
In the textile industry, a variety of fabric printing techniques are employed. Here are a few of the most popular techniques:
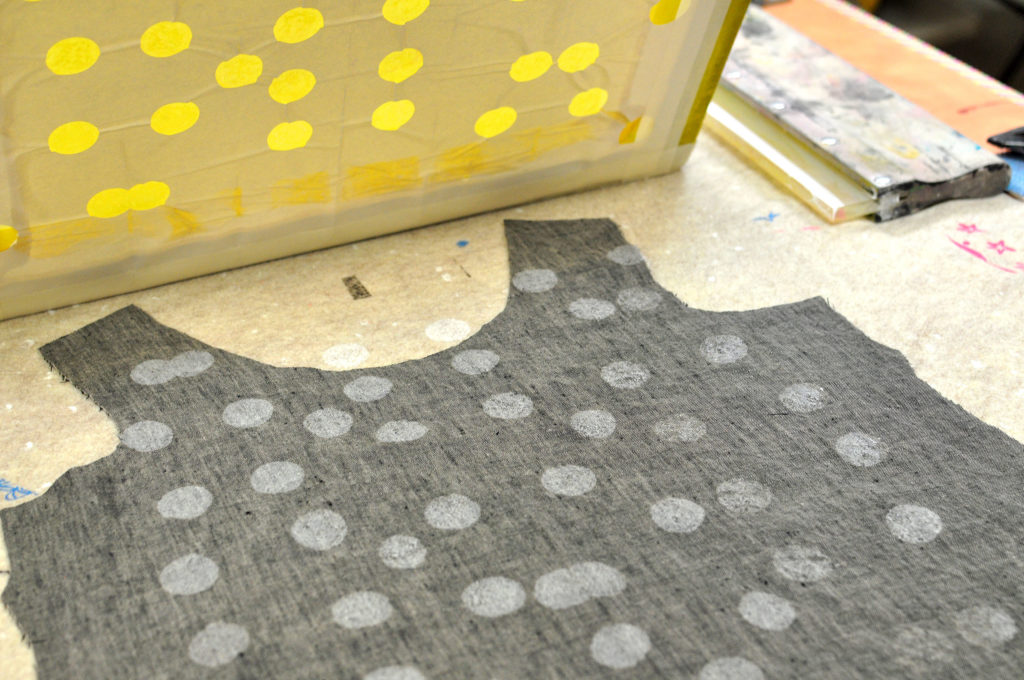
1. Screen printing
One of the earliest and most used methods for printing fabrics. To apply ink to the fabric, a mesh screen and stencil are used. For each color, a different screen is employed, and the ink is pressed into the fabric through the screen’s openings.

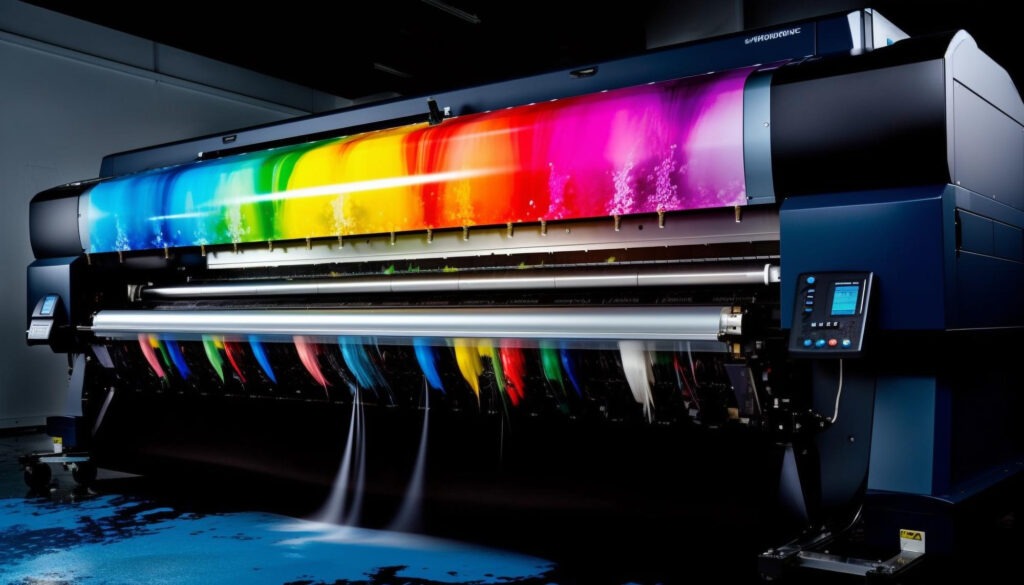
2. Digital Printing
Also referred to as direct-to-garment printing, digital printing entails using specialized inkjet printers to print the pattern directly onto the fabric. With limitless color possibilities, it provides prints of the highest quality and detail.
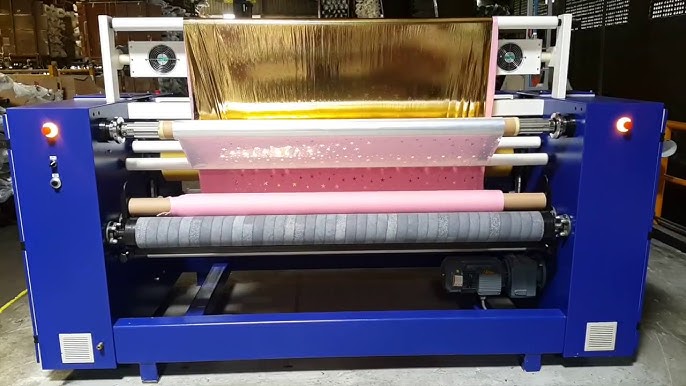
3. Heat Transfer Printing
In this technique, pigment or sublimation inks are used to print a design on a particular transfer paper or film. As a result of the ink’s sublimation and subsequent bonding with the cloth fibers, the pattern is subsequently transferred onto the fabric under pressure and heat.
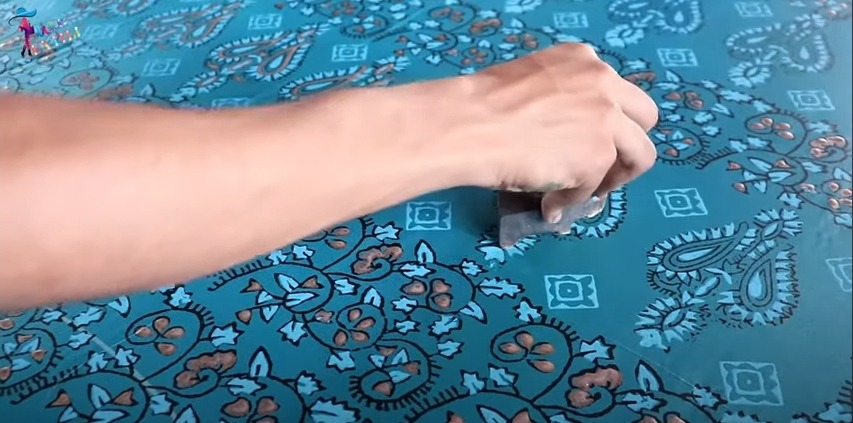
4. Block Printing
Block printing is an old-fashioned method of printing cloth that entails carving a design onto a block of wood or linoleum. To transfer the design to the fabric, the block is next inked and rubbed against it. Complex patterns and motifs are frequently made using this technique.
5. Discharge Printing
In this method, a chemical agent is used to remove the dye from selected portions of a colored fabric, producing a design or pattern. It is frequently used on dark-colored fabrics to generate lighter or bleached motifs.
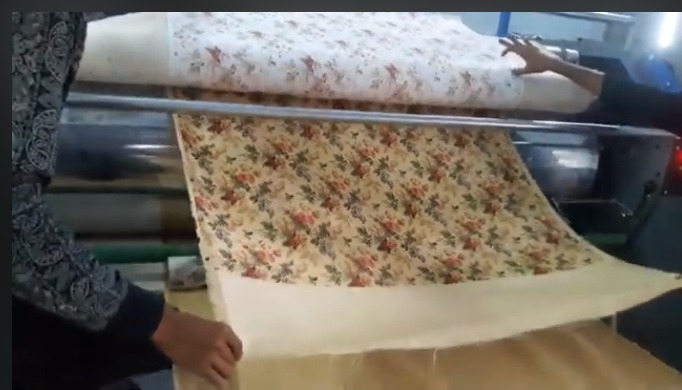
6. Rotary Printing
Rotary printing employs cylindrical screens or rollers engraved with the desired design. As the fabric runs through the machine, the screens rotate and apply various colors of ink on it. It is a fast and effective method of mass production.
7. Foil Printing
Foil printing entails adding a particular adhesive to the fabric and then heat-pressing a metallic foil onto the adhesive. The foil sticks to the sticky spots, resulting in a shiny and reflecting image on the fabric.
These are only a few examples of cloth printing techniques; there are modifications and combinations of these procedures as well. Each technique has its own set of advantages and is appropriate for a variety of applications and design needs.
Printing Techniques and Color Combining
Following the preparatory stage, the fabric is now ready for the transformative stage of printing. To bring the desired designs to life, fabric printing requires complicated methods and delicate color mixing. Let’s take a step-by-step look at the printing process and the artistry that goes into it.
1. Print Machine Types
The two main types of print machines used in fabric printing are rotary and flatbed. Each machine type has a different screen and has its own set of benefits and applications. Rotary printing is often utilized for bigger production runs and patterns that, because to technological constraints, cannot be achieved on flat screens. Flatbed printing, on the other hand, allows for more detailed designs and greater color arrangement versatility.
2. Screen-Making Process
Before delving into the printing process, it’s critical to understand how screens are created. Colors are transferred into fabric using screens. While the specific method of screen making is beyond the scope of this blog post, it requires numerous procedures such as screen stretching, picture preparation, and stencil development. These screens are meticulously constructed to ensure perfect color placement during the printing process.
3. The Color Kitchen
Within the print factory, there is a designated space known as the color kitchen. This is where the magic of color mixing takes place. The color kitchen employs machinery capable of mixing massive volumes of dyes, similar to the computerized paint systems seen in hardware stores.
Instead of gallons, these devices combine color in 50-gallon drums. To create the appropriate tints and colours, different dyes are meticulously measured and combined.
4. The Flatbed Fabric Printing method
Let’s take a look at the flatbed printing method, which enables for intricate and exact designs. The cloth is placed on a rubber belt, and the bed of the printing machine can hold many screens, generally ten or more. The first screen in the process applies the first color, such as black, to the fabric. The screen is dropped onto the table, and a squeegee is used to push the color onto the white fabric from side to side. The screen is then lifted, the squeegee is returned to its starting position, and the cloth is moved 24 inches forward to the next screen by the belt.
Subsequent screens add colors to the fabric layer by layer. The design gradually comes to life as each screen adds its own color to the developing ensemble. Alignment is critical during this step to guarantee precision registration, when each hue lines up perfectly without overlapping or gaps. This painstaking attention to detail ensures the integrity of the final design.
5. Color Application and Layering
During the flatbed printing process, distinct colors are applied to the fabric in a specified order. For instance, black, green, pink, and purple. Lighter hues can be printed on top of darker shades to produce a three-dimensional illusion. Open sections on the screens allow dye to pass through, while closed areas block the dye, resulting in the desired color distribution.
The amount of colors that may be printed is determined by the equipment, with some flatbed printers capable of printing up to sixteen. The more colors that can be allowed, the longer the machine’s bed. Each color layer adds depth and complexity to the design, gradually transforming the fabric from plain white to a vibrant and captivating visual spectacle.
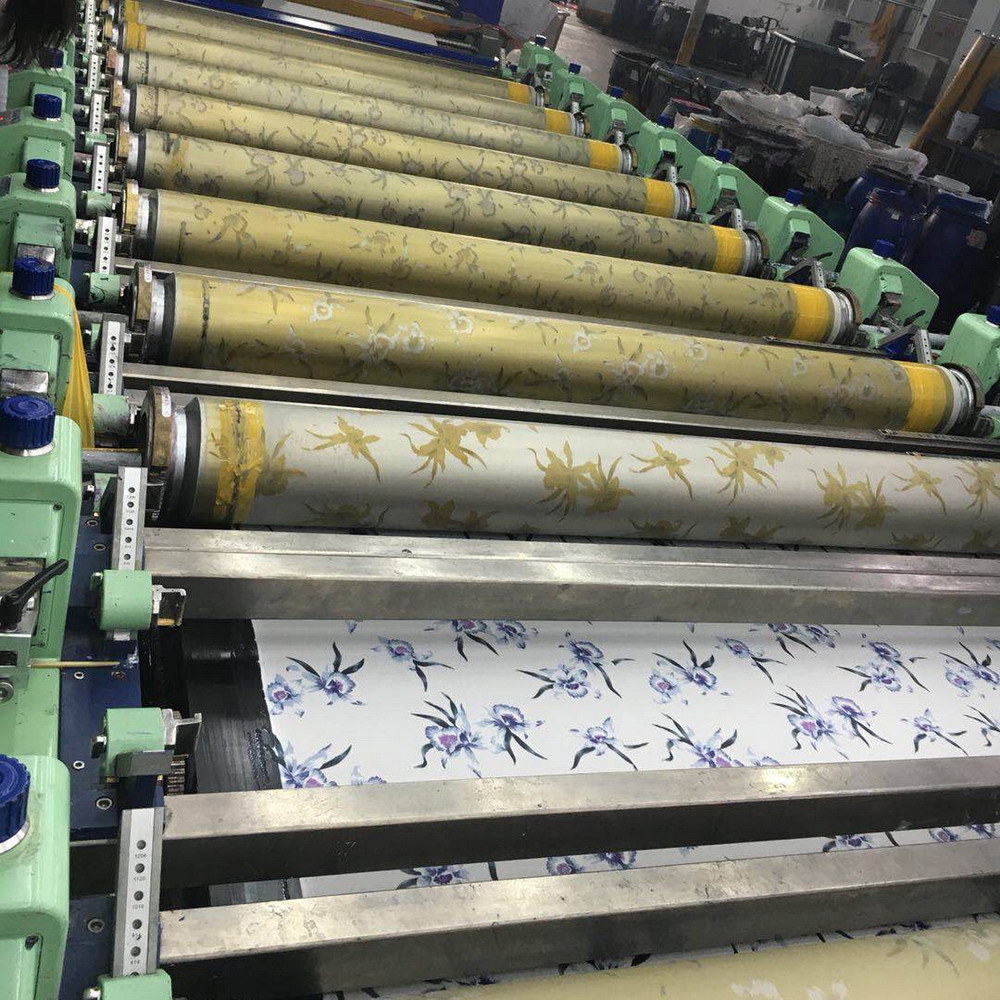
6. Rotary Printing
Rotary printing, as opposed to flatbed printing, employs a cylindrical screen, or roller, that spins constantly during the printing process. This method enables faster printing speeds and is frequently used for large production runs. Each roller on the rotary machine moves the fabric.
Sequentially applies a single color on the fabric. Additional colors are added to the fabric as it passes through the machine until the entire fabric is covered with the desired design. Rotary printing is suitable for high-volume production due to its efficiency and speed.
Fabric printing relies heavily on color mixing and exact design execution. The artistry underlying this stage of the process is demonstrated by the workmanship and knowledge necessary to generate colorful and detailed designs. Fabric printing transforms raw materials into aesthetically appealing works of art by using modern technology, color blending, and exact screen placement.
Finishing Touches: Steaming, Washing, and Inspection
After the printing process, the cloth reaches the vital finishing stage. This stage includes various critical steps to guarantee that the printed cloth has the intended appearance, durability, and quality. Let’s look at the finishing touches that turn the printed fabric into a finished product ready for sale.
1. Steaming
One of the first phases in the finishing process is steaming. Steaming is required to adhere reactive colors to the fabric. Without adequate steaming, the colors used during printing would be subject to washing out or fading. High-temperature steam is used to produce a chemical reaction between the dyes and the cotton strands, resulting in permanent color. Steaming ensures the endurance and colorfastness of the printed fabric.
2. Washing
After steaming, the fabric is transferred to a large-scale washing machine, often referred to as the “world’s largest washing machine.” This machine is made up of numerous washing stations, each with a varied water temperature and chemical concentration. The fabric is dipped many times in each station as it goes through the washing line. As the fabric moves through the line, the water temperature progressively rises as the chemical concentration falls. This method successfully removes any extra colors, chemicals, or contaminants from the cloth.
The washing line provides a steamy environment, but it is critical in ensuring that the printed fabric meets colorfastness criteria and achieves the ideal appearance and softness.
3. Drying and Inspection
After washing, the fabric is dried with big hot metal rolls. These rolls effectively remove surplus moisture and enable full drying of the fabric. The fabric is available for inspection once it has dried.
Fabric inspection is an important stage in quality control. Skilled professionals analyze the fabric thoroughly, looking for any print or weaving faults that may have happened during the preparation, printing, or finishing steps. Inspection identifies any defects, misalignments, or blemishes that may influence the overall quality of the fabric. Depending on the manufacturing procedures, some factories inspect and roll the fabric at the same time, and others prefer to inspect the fabric before rolling it for shipping.
It is important to note that, despite the greatest care exercised throughout the entire fabric printing process, certain errors may occur. The inspection process allows for identification and correction, guaranteeing that only fabrics that satisfy the required requirements reach the market.
The printed fabric has undergone critical treatments to improve its appearance, durability, and quality by adding the finishing touches. Steaming ensures color retention, while washing removes any remaining dyes or contaminants. Thorough drying and examination assure the fabric’s overall integrity and compliance with the standards.
The combination of precise printing procedures, meticulous washing, and stringent inspection guarantees that the completed fabric is ready to be rolled, packaged, and transported to fabric retailers all over
Packaging and Distribution
After the fabric has been finished and inspected, it is ready for packaging and delivery. This critical step guarantees that the printed fabric reaches its final destination – the shelves of local fabric stores or the hands of enthusiastic customers. Let’s take a look at the packing and distribution of printed fabrics.
1. Sealing and Packaging
The first step in packaging is to utilize a sealing machine. The cloth rolls are wrapped in plastic and the ends are firmly secured. This protective packaging not only keeps the cloth clean and free of harm, but it also allows for easy handling during shipment. The sealed rolls are subsequently supplied to staff who are in charge of stacking them on big pallets.
2. Export Cartons and Shipping
The rolls are transferred to export cartons once they have been properly packed and placed on pallets. These containers are specifically intended to keep the fabric safe while in transit. The rolls are carefully positioned within the cartons to avoid moving or damage during transit. The cartons are now ready to ship.
The fabric leaves the Asian production facility on its way to its destination, which could include fabric retailers all around the world. To meet market demand, the fabric is often sent in big numbers. Coordination of logistics, transportation arrangements, and timely delivery to numerous places are all part of the shipping process.
3. Unloading, Unpacking, and Storage
When the fabric rolls arrive at their destination, they are unloaded from the shipping containers or vehicles. The crates are unpacked and the rolls are handled with care to avoid damage or maltreatment. The rolls are received by fabric retailers or wholesalers, who sort them for storage or immediate display.
The rolls are generally unrolled into bolts in fabric stores, making an inviting and accessible display for clients. This procedure necessitates cautious handling in order to preserve the fabric’s integrity and avoid creases or damage. The fabric is now ready for enthusiastic creators to view, purchase, and transform into wonderful masterpieces.
4. Local Fabric Stores and Online Retailers
Printed fabrics end up at local fabric shops where they are displayed next to other fabric options. These shops give clients a tactile shopping experience that enables them to feel the texture, look at the colors, and envision their possible projects. Customers can choose the ideal materials for their unique needs with the help of knowledgeable professionals who can offer inspiration and direction.
Printed fabrics are available to consumers through internet shops in addition to physical fabric stores. Online stores allow users to browse and buy from the comfort of their homes, and they also provide convenience and a large selection of textiles. Customers can look through various designs, colors, and fabric types, make educated decisions, and having the cloth sent right to their home.
Conclusion
Packaging and distribution are the final steps in the journey of fabric printing, ensuring that the benefits of the printing process reach their intended audience. From the sealing and packaging of fabric rolls to their shipping and arrival at fabric stores or online merchants, every stage of this procedure seeks to preserve the fabric’s quality, safeguard it during transit, and make it available to fabric fans worldwide. Whether in real stores or online markets, printed materials are ready to stimulate creativity and be converted into unique items by dedicated craftsmen.